Stick to a few basic principles, and you'll easily make good garden compost
Composting Garden Waste
How to start making compost bin as a nutrient rich soil conditioner to help improve your garden and recycle the waste
Other composting pages: Compost maker bins | Making compost heaps | Q and A's
If you have a garden that is large enough to have one or more of a lawn, a hedge and flower borders, you probably have enough space to make your own garden compost
Why make garden compost?
![]() It recycles organic material in your garden in the most efficient
way without any transportation needed, it is the most
environmentally friendly way of dealing with garden waste.
It recycles organic material in your garden in the most efficient
way without any transportation needed, it is the most
environmentally friendly way of dealing with garden waste.
![]() It retains nutrients in your garden reducing the need to use
fertilisers.
It retains nutrients in your garden reducing the need to use
fertilisers.
![]() It produces a great soil conditioner that can be used to improve
conditions for your garden plants.
It produces a great soil conditioner that can be used to improve
conditions for your garden plants.
Garden compost is wonderful stuff, it improves the texture of just about any soil it is added to. If you're a plant, compost added to your soil is like a nice clean flannelette sheet and duvet cover on your bed just as it's getting cold in winter, It's like having ice, lemon and a cherry in your gin and tonic instead of it being served on its own and warm, it's like finding that there's butter and a choice of jams and marmalade after a week of dry toast for breakfast.
Key Points
![]() Use more than one bin, at least two and three are better
if you have the room.
Use more than one bin, at least two and three are better
if you have the room.
![]() Cut the things you add to the heaps into small pieces,
this is the best thing you can do to speed up the composting
process, it will still happen if you don't, but more slowly.
Cut the things you add to the heaps into small pieces,
this is the best thing you can do to speed up the composting
process, it will still happen if you don't, but more slowly.
![]() Mix green (high nitrogen) and brown (high carbon) materials
together so there's not too much of either clumped
together.
Mix green (high nitrogen) and brown (high carbon) materials
together so there's not too much of either clumped
together.
![]() Don't let the compost heaps dry out, the process
will stop if they do, pour a full watering can over them if
this happens to get things moving again.
Don't let the compost heaps dry out, the process
will stop if they do, pour a full watering can over them if
this happens to get things moving again.
![]() Once there is enough almost rotted material in a heap, turn
it over onto a final heap and leave it another few months
to finish composting before using without adding anything extra.
Once there is enough almost rotted material in a heap, turn
it over onto a final heap and leave it another few months
to finish composting before using without adding anything extra.
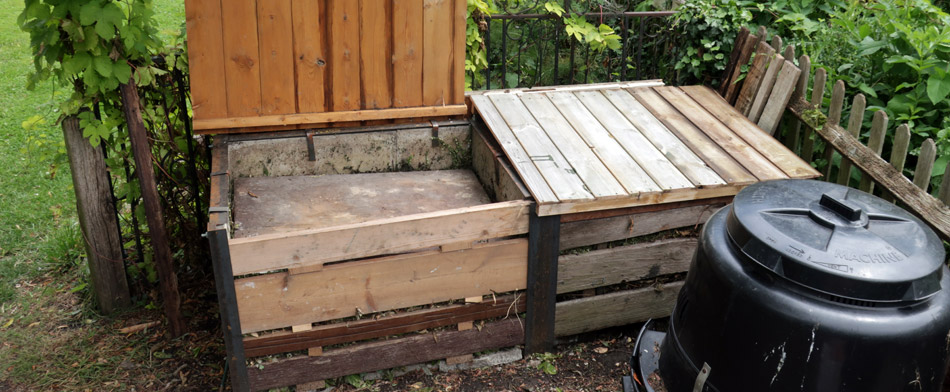 Two
composters are better than one, three are better than two
Two
composters are better than one, three are better than two
Keep Your Composting Microbes Happy
A compost heap is a large culture of microbes feeding on dead plant matter, these are bacteria and fungi that will break down the material on your compost heap.
In order to obtain well rotted dark brown, crumbly compost you need to keep happy a varied community of bacteria and fungi. Slimy, smelly stuff that takes forever to break down is a result of too much of the wrong kinds of decomposer caused partly by providing poor conditions for them to grow in.
Keep your microbes happy and you will get a good result.
1 - The correct balance of food, Carbon : Nitrogen ratio
The decomposers in your compost heap need a balanced diet of carbon rich (brown material) and nitrogen rich (green material). Too much brown and decomposition grinds pretty much to a halt. Too much green (like piles of grass clippings) and it turns into a slimy mess.
You don't need to measure it out just be aware of it, by mass 30:1 brown to green is needed, in reality it means that there should be some visible green amongst the brown and it should be well mixed up. I have a couple of big plastic tubs next to my compost heaps, if I have too much brown (autumn leaves for example) or green (grass clippings) I put them in the buckets temporarily and then mix them into the heaps when I next have the missing element to hand.
The carbon-rich material (brown) will comprise most of the bulk of the finished compost, while the nitrogen-rich material (green) will get it all rotting actively and add valuable nutrients.
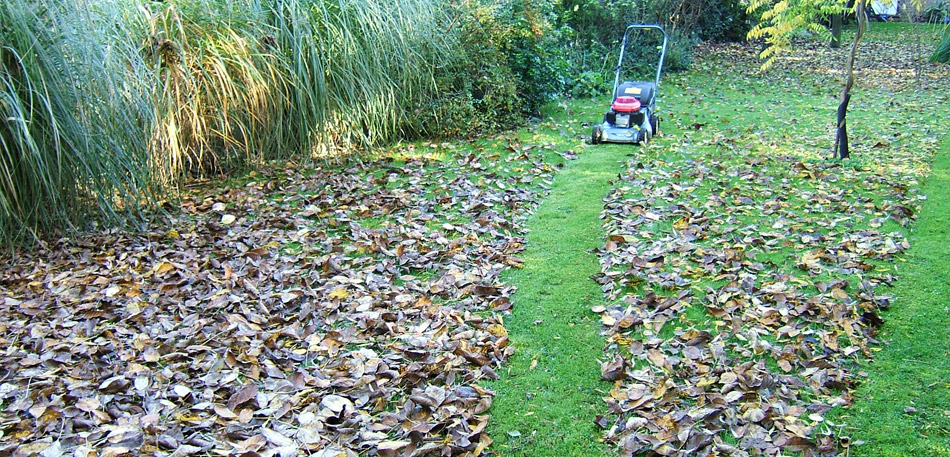 Using a lawn mower set higher than
usual is a good way to pick up autumn leaves, it also shreds
them and mixes them with grass clippings to speed up rotting
Using a lawn mower set higher than
usual is a good way to pick up autumn leaves, it also shreds
them and mixes them with grass clippings to speed up rotting
2 - Supply food in small pieces
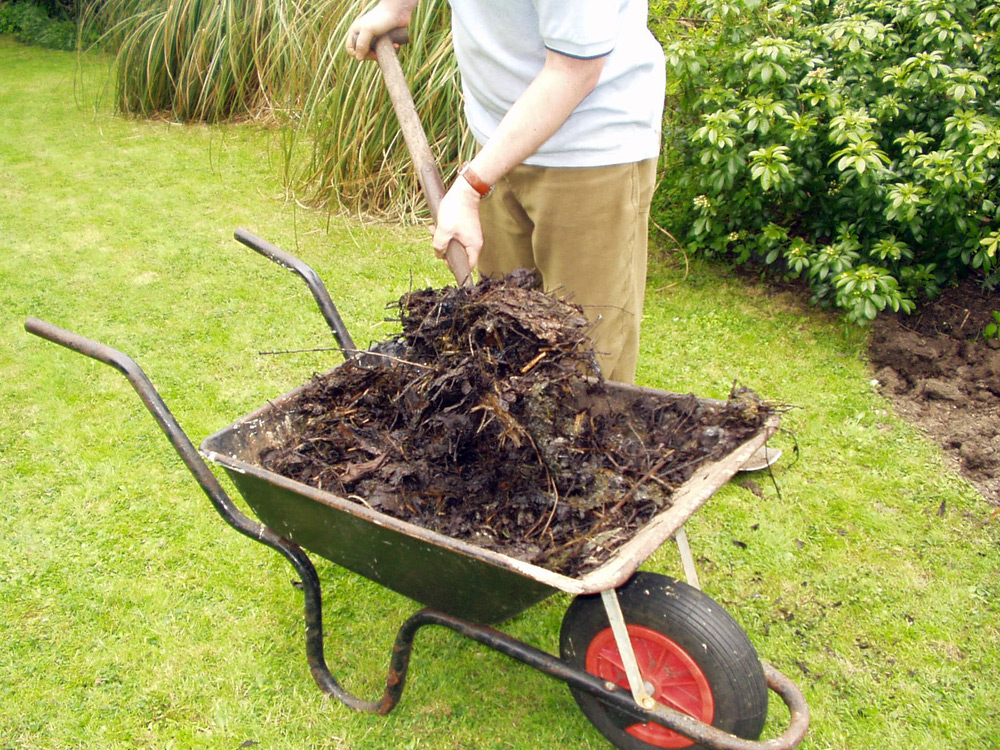
Reducing the size of your material before adding it to the compost heap is probably the best single step you can take to make your heap rot down quicker. It doesn't need to be shredded, though is better if you can do this or at least cut or break it up in some way to help the decomposers get into the plant matter and speed things up. If I can't shred things, then I aim for no bigger than 4-6" though this increases when I'm tired or have lots to do.
Just like our own skin protects us from infection, plants have similar protections. When we compost plant material we need to break up the surface to expose the soft inner parts, smaller pieces also rot quicker. The raw materials of the compost also need to be mixed up so that the decomposers (which are only little and can't travel far on their own) regularly come into contact with fresh food, turning the heap helps too.
3 - Keep them pleasantly moist
All life requires water to be active, the compost heap is very much a place of life. Saturate your compost heap when it is made with a watering can or bucket of water and keep it covered to retain the moisture after this. If you add a lot of fresh shredded material at one time, it is surprising how much water it will soak up.
Once made and left to rot, your heap should have a cover to stop rain from getting in and to stop it drying out.
4 - Oxygen to breathe is good
 The decomposing microbes grow better when oxygen is
plentiful - aerobic conditions. Horrible smells
and slimy messes result from oxygen deficient - anaerobic -
conditions, if you've ever put lawn clippings into a bin
liner and closed it up you will recognise this description of
what happens. Anaerobic conditions also favour a different set
of microbes that you want to avoid, also the aerobic microbes are
far better at making good compost.
The decomposing microbes grow better when oxygen is
plentiful - aerobic conditions. Horrible smells
and slimy messes result from oxygen deficient - anaerobic -
conditions, if you've ever put lawn clippings into a bin
liner and closed it up you will recognise this description of
what happens. Anaerobic conditions also favour a different set
of microbes that you want to avoid, also the aerobic microbes are
far better at making good compost.
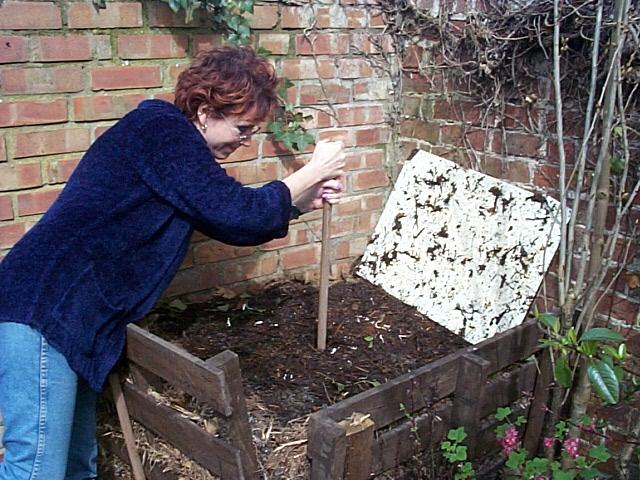
You can help oxygen reach the contents of the compost heap by having slatted or drilled (big holes) sides for air flow. Once the heap has got going (1-2 weeks) push a rake or broom handle into the heap, right down to the bottom, I do this in the pattern of the dots on the 5 side of a die, wiggle it around to create a sort of chimney. You should get steam coming out of these vents which will help air and oxygen circulate into and through the heap. As the warm air rises up the chimney, it will be replaced by cold air being drawn in the sides over the material of the heap, so supplying it with oxygen.
5 - Insulation keeps them warm and active
A good well-made heap will generate heat, starting the day day after it has been made and lasting for around two weeks to a month or more depending on the time of year and how much material you added. An insulated lid (in particular) and sides if possible will help to keep this heat in and speed up the decomposition of the compost.
I use a thick piece of exterior grade plywood which is heavy enough to help compress the heap as it rots with the addition of some insulation underneath. I've used two layers of scrap twin-wall polycarbonate on one heap and a similar polypropylene board from an estate agents sign on the other, held in place with some short galvanized nails.
Alternatively an old door mat works well, less so for carpet which can start to fall to pieces after a while shedding tufts that get everywhere.
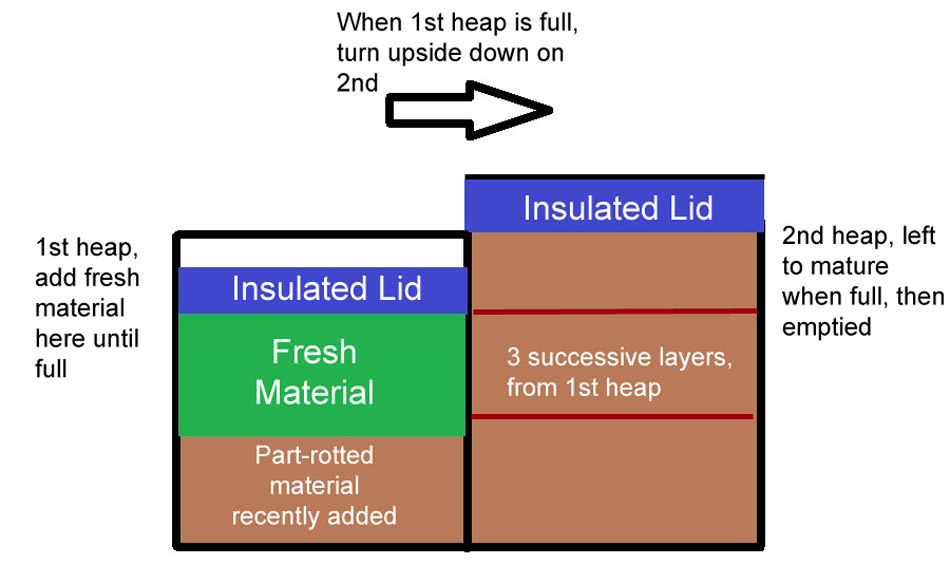
More than one heap increases your
capacity for making compost and also increases the efficiency
and speed of the process. Whether you have two or three heaps,
the principle is the same. Let one fill up - go down - fill
up - until it goes down very slowly. At this point turn it upside
down on the next heap, repeat this process until the next heap
is full then turn it upside down on the third heap when it can
be left another few months to finish off and then be used around
the garden.
Best Composting techniques
- It is better if you can make a large heap of
material to be composted in one go. Plan to do
lots of pruning and weeding at the same time, I always coincide
hedge trimming with lawn mowing for instance and leave the
lawn a little longer than normal so I can mix the clippings
from both activities.
- Shred the material that you add to
the heap if you can to reduce the size. If you can't
shred it cut into pieces no more than 10-15cm long.
- Make sure you mix brown and green material
together, just make sure that there's always some of
each and always more brown than green.
- Put some kind of lid on the compost
heap to keep the rain off and for insulation.
- Water very well initially and keep moisture
in afterwards, but protect from rain.
- Push a broom or rake handle into the heap after a couple of
weeks when it has settled to open it up to the air.
- Turn the heap over a couple of times
once made after 3-4 months each time.
- More than one compost heap works much better. Two or three similarly sized heaps will allow you to handle more material and produce better compost more quickly. I have two longer term heaps and a separate plastic compost bin where material goes to start with, it decreases in size very quickly in the first month or so.
Copyright 2000 - present. All Rights Reserved | Privacy Policy Statement