Plug Plants
"Plug plants" or just "plugs" are the names given to small module grown baby plants that can represent great value for money, they need to be handled correctly to get the most out of them.
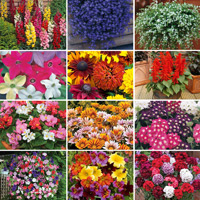 Annuals
Buying plants as baby plugs avoids the difficult germination process at home.
Correct germination temperatures, humidity and water levels can be difficult to achieve at home without propagation equipment, plugs are plants where the germination phase has been done for you. Even if you can provide the right conditions, the cost of seed in the small quantities needed by the home gardener can mean little if any cost saving. Plugs are usually posted out relatively early in the season and need growing on under protection before being planted out after all danger of frost has passed.
You will need:
- Plug plants - Buy plug plants
- Seed trays
- Multi purpose compost
- Plant labels if required
They require dealing with as soon as you receive them, ideally you should prepare for them before they arrive.
They are usually sold at the point where they are just ready to pot on to be given more space and compost to grow in. They should be planted on within a few days maximum of them arriving with you at home, I do them the same or next day. Leave them any longer and they will start to grow leggy and weak.
If you're not ready to deal with them on arrival, remove all packaging and place in a bright but coolish position (not with central heating).
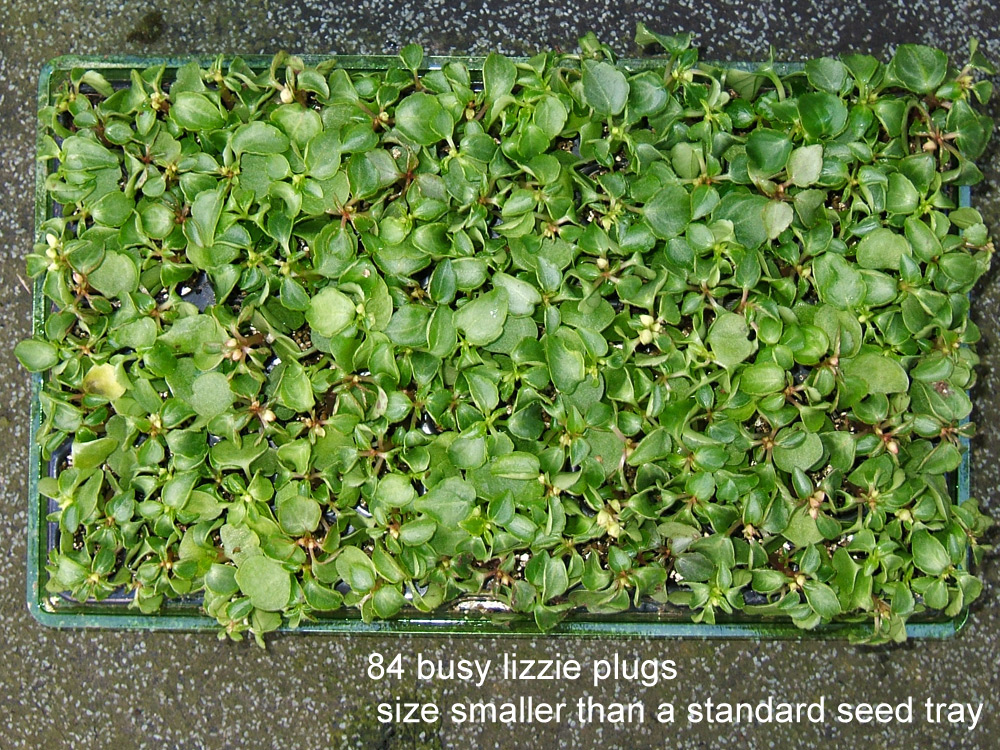
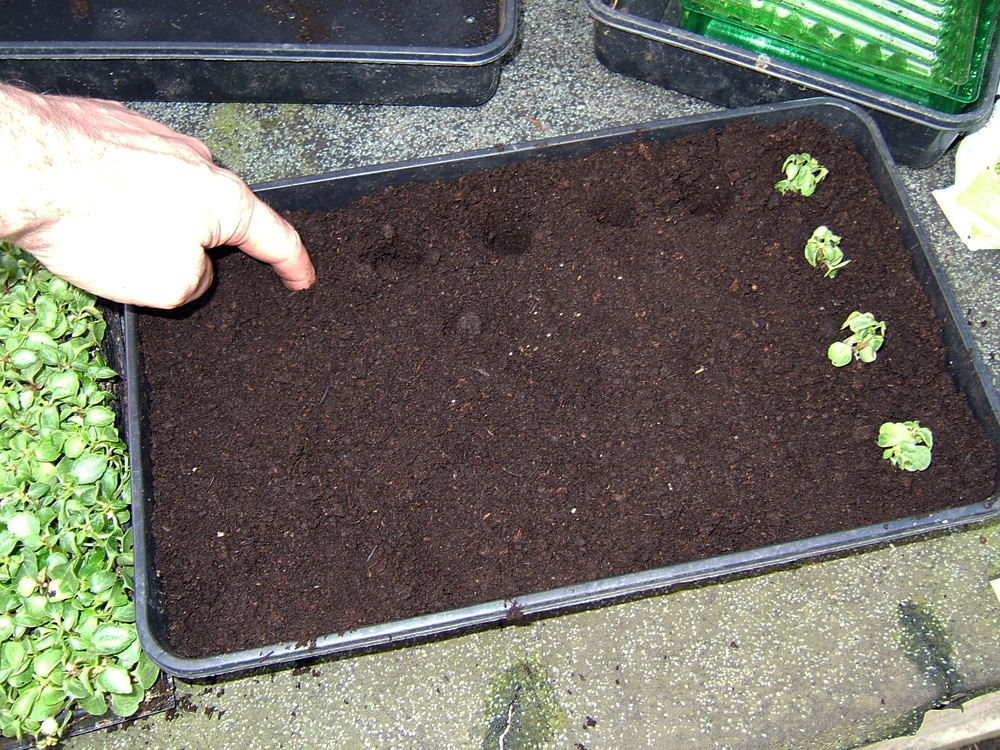
A small tray of plugs will need a lot of space when potted on, make sure you have the room for them. These 84 plugs will completely fill these 3 seed trays.
I received these half-hardy busy lizzie plugs in March which was far too soon for them to go outside, I did what I usually do in plant them into seed trays. This gives them room and nutrients to grow before planting them into their final containers for the summer later on in May.
You could plant them directly into their final containers as long as you have the space to keep them protected under cover until it is safe to put them outside. I have lots of containers and restricted space for protection so I go for this intermediate stage. It also works well to grow the plants on if they will eventually be planted into your soil in beds.
Fill the trays to within 1cm of the top with multi-purpose compost.
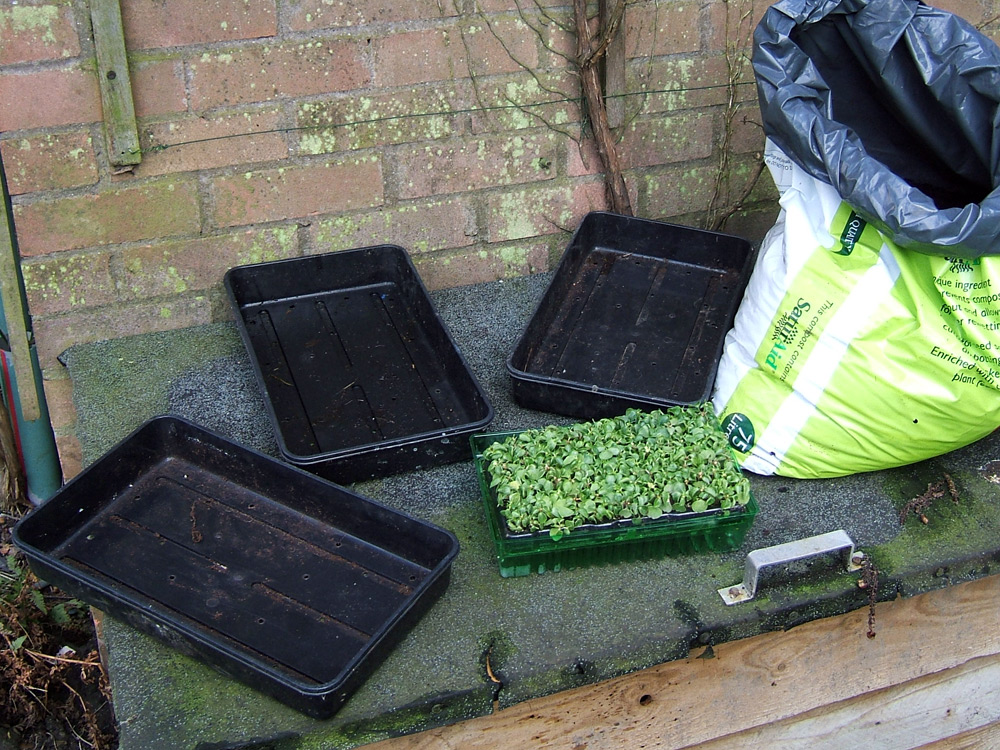
Seed-trays, buy the more expensive ones with thicker plastic, they last waaay longer than the cheap thin ones which can split the first time you pick up a full one by the edge.
As the plants are small and delicate, pulling from the foliage can result in separating top growth from roots. Soak the plugs in water for half an hour or so before removing them to soften the compost they are in if necessary.
Tilt the tray up and gently squeeze the bottom of the plug to loosen it, it may then start to fall out or can be readily pulled from above without fear of damage. If it's a bit stubborn squeeze in one direction and then in the other.

You'll need to do some sums before you start to make sure you have enough space for the plugs to be planted into. I have 84 here which is 3 seed trays of 28 plants. Each tray has 4 rows of 7. make a hole in preparation with your finger, gently place the plug into the hole and then push the compost together.
When you have filled your seed trays, the young plants should be watered. Use tap water for this first watering rather than rain water from a butt. Water in butts will build up bacterial and fungal spores that are gathered in the run-off and also from organic material that gets in the butt. Larger plants prefer rain water and cope with this but it's best not to make life more difficult than needs be at this stage for these transplanted and somewhat traumatised young plans.
I prefer to water from below rather than above as it disturbs the compost the least.
I use my wheelbarrow for this purpose. Fill it to a depth of 2 inches or so with water and carefully place the tray of plants in it. It will float to begin with and then slowly sink, keep an eye on it though I've never had one go below the water level. They sit with the water level with the compost. Lift the tray out and place it on the ground to drain fully before placing it in a bright protected place such as a frost-free greenhouse or similar. A windowsill is also good but should be in an unheated spare room, take care with run-off when watering.
The plants can be put in their final positions in containers or in the soil in May when risk of frost has passed, the exact date depends on where you live.
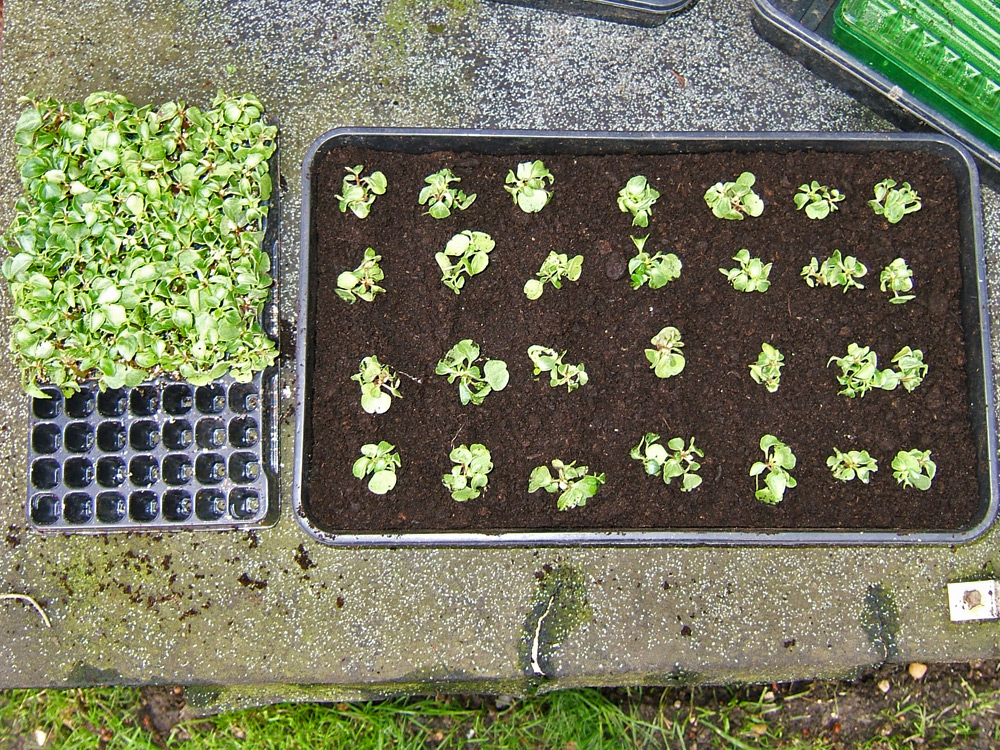
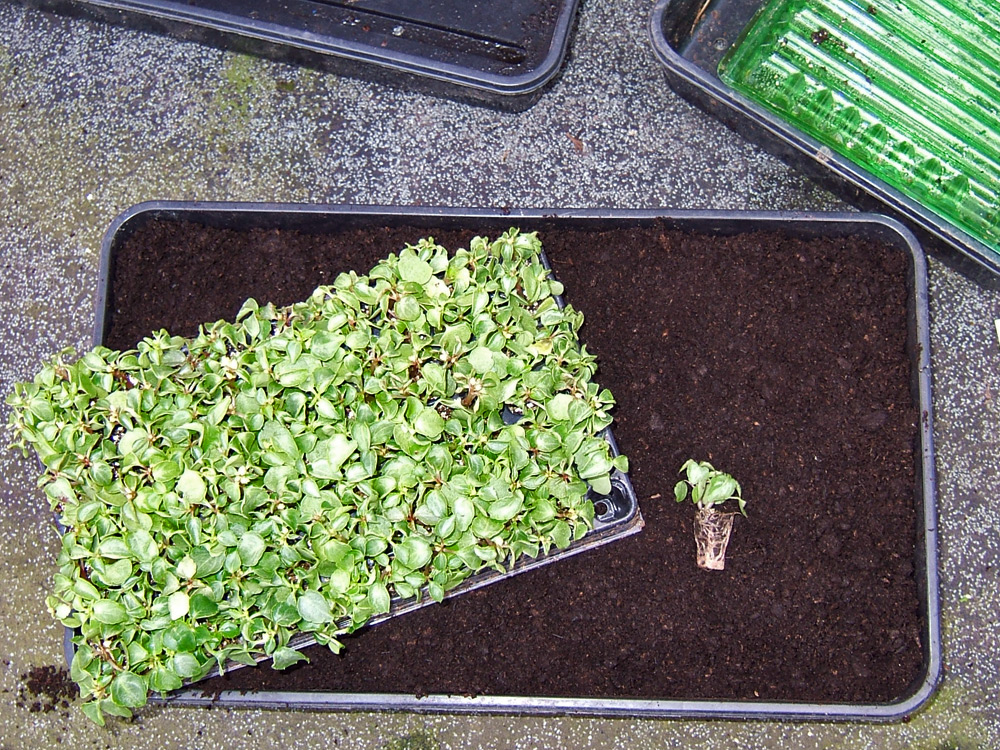
1/3rd of the plugs as received on the left fill the seed tray.

A few weeks later and ready to plant in their final flowering positions for the summer.
Larger plug plants
Some plants such as fuchsias that are grown from cuttings rather than seed are sold as large plugs and can represent excellent value, again they need to be dealt with correctly almost immediately you receive them.
You will need:
- Large plug plants
- 3" or 3 1/2" (7-9cm) plant pots, 1 for each large plug
- Multi purpose compost
- Plant labels if required
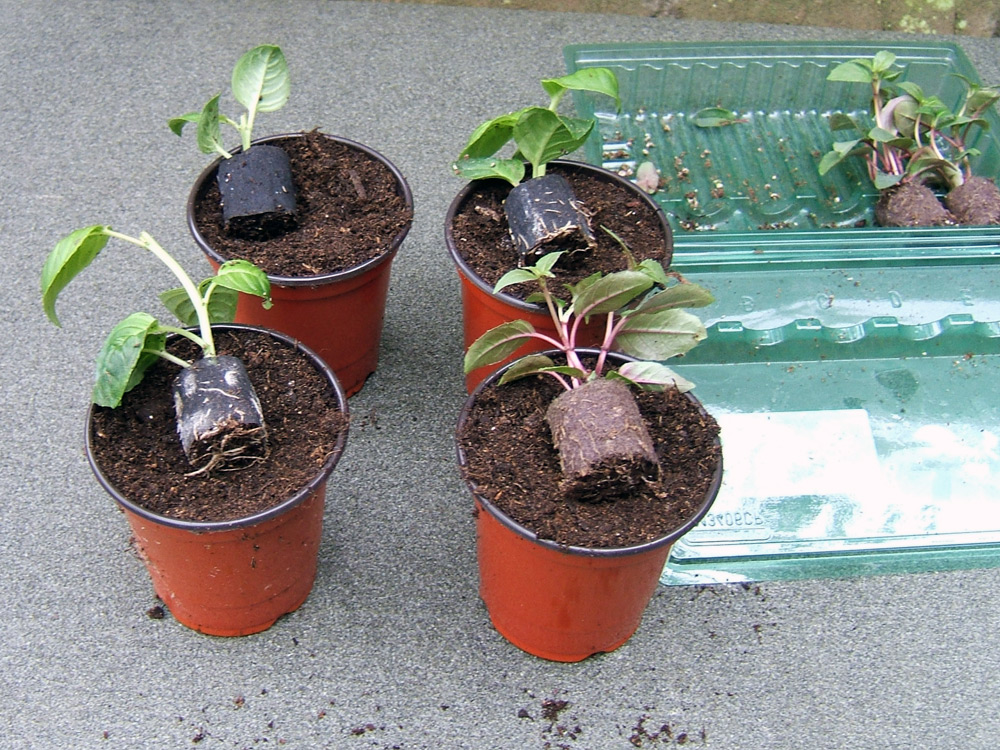
These are rooted Fuchsia cuttings that have arrived mail order from Thompson & Morgan in cosy little greenhouses, the same principles here apply to all large plug plants.
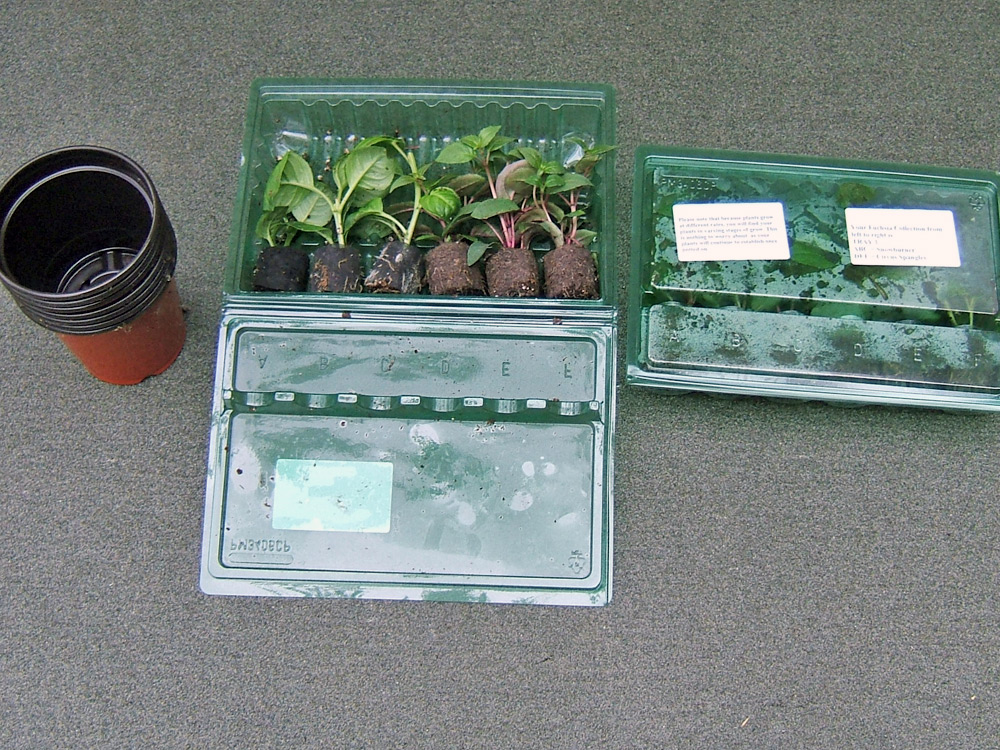
These cuttings were placed in biodegradeable pots at the nursery so the roots can grow through as can be seen in this picture, they don't need to be removed from them. The packing that the plants arrive in ensures they arrive intact and in good condition. Remove them on reciept, if you leave them in the plastic "greenhouse" they will become crowded and leggy and there is a risk of fungal disease.
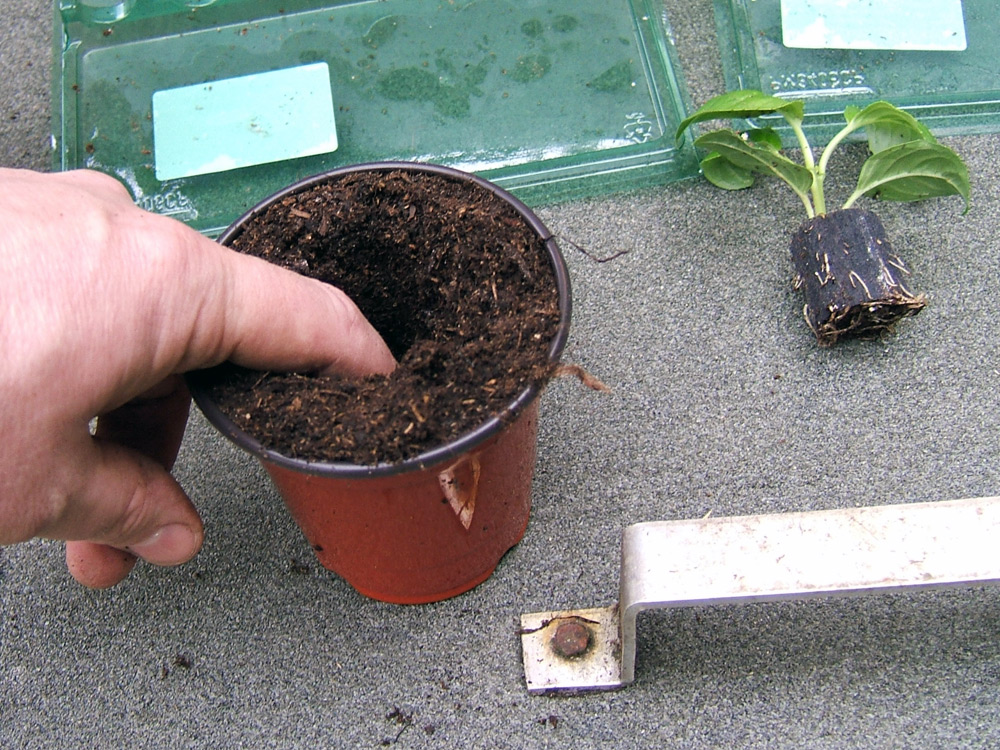
If the rooted cuttings are removed from the packaging, these roots will shrivel if left exposed to the air for a day or two. They really need potting on on the day of receipt or the next day at the latest.
To get the best from these plants, I use 3 or 3 1/2 inch pots and multi purpose compost.
Be aware that these two small packs of 6 cuttings each will take up considerably more space when grown on individual plant pots, so don't be too enthusiastic when ordering as you may end up with more than you can deal with.
Fill the pots with compost and firm down gently, use a finger to make a hole about the same size as the root ball of the cuttings.
Place the plant into the hole and gently push the compost up against the root ball. The soil level should be exactly the same as it is for the cutting, not sticking out nor buried below the surface.
Now is the time to label the plants. These four are different varieties as can be seen to some degree by their different leaf size, shade and the start of their growth habit.
When all of your plants are potted up, you will need to water them.
I recommend that you use clean tap water for this first watering rather than rain water from a butt.
Grow these plugs on in a sheltered place until all risk of frost is passed before you put them outside in larger containers for the summer. They WILL need planting on again. each plant should be given the equivalent of 2-3 litres of compost in a container, so 3, 4 or 5 in a 10L basket for instance, more will fill it quicker but will become overgrown sooner.

Copyright 2000 - present. All Rights Reserved | Privacy Policy Statement